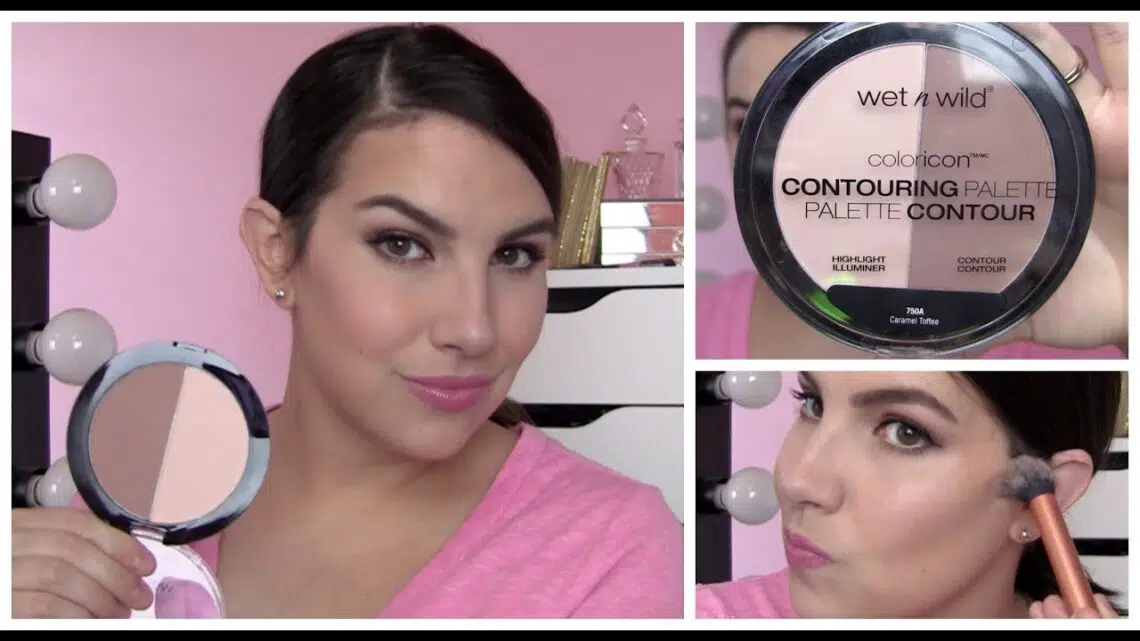
The Advantages of Wet and Wild Color Icon Contouring Palette
Wet and wild color icon contouring palette is a set of color swatches that can be used to add color to your icons. This is the best way to create consistent, rich-looking icons on any platform. The most distinctive thing about this product is that it takes you from flat colors all the way up to saturated colors.
In fact, using this product, you can make anything look like an icon, from an image of a person and their name to a dog and its name. You can even do it for your website or for whatever other apps or websites you use. But the great thing about this product is that it is easy to use and works with all major platforms (Mac, Windows, iOS & Android).
You get 70+ in-app color swatches which include:
• Icon colors • Icon colors—adjustable • Icon colors—saturated • Icon colors—shade adjustment • Icon colors—saturation adjustment
The swatches allow you to adjust your icons’ colors so they are softer or more saturated and how much contrast there is between the icon’s color and the surrounding background (this allows you to avoid too strong a contrast). By design, this product doesn’t require any additional work since it does most of what an icon editor does for you. It also offers a quick way of making your icons look great — simply drag them into place on any file type or application.
The Disadvantages of Wet and Wild Color Icon Contouring Palette
Color icon contouring is one of the most popular and widely used tool in the software world. But when it comes to color icons, there are a few features that make it difficult to work with and some that make it even more confusing. One such confusing feature is the wet & wild color icon contouring palette.
To be quite honest, I didn’t know if I should post this link or not, since I don’t think wet and wild color icon contouring palette should exist at all. It seems like a feature that belongs in an app store version of Photoshop (or maybe ‘apps for application’). But actually, it is more like a feature for an older version of Photoshop that has been deprecated.
And yet, we still see many developers saying: “Wet & Wild Color Icon Contouring Palette is better than any other tool available” or “I use this app exclusively!” (which implies they use Photoshop). This makes me wonder if they really do use Adobe products beyond Photoshop CC or they just have really good marketing skills…
Though the fact is that most people using this tool are either using old versions of the software or doing so by default. And it would be a shame to waste their time by posting links to those old versions instead of making them work with CC (it doesn’t mean you should post links only to old ones).
So do let me share my experience with this product and convince you not to put your trust in a product which won’t stand the test of time.
Conclusion
I just wanted to share a quick iconography tip for developers: the color palette that I am going to go over is one that I use quite a bit and have found to be extremely helpful in my workflow. It is the Color Palette from the Dotcom University website. It uses four simple but powerful options to control color, including how much of a hue change you want, what kind of color change you want to achieve (from 1% to 100% saturation), and how much contrast you want between foreground and background colors.
The four options — lightness, saturation, hue, and contrast — are all pretty self-explanatory in terms of what they do and how they work together. For example, lightness allows you to selectively add or subtract color without changing the general brightness of your image; saturation controls the overall brightness of your image; hue changes the color by enhancing or suppressing the particular hues on your palette; and contrast controls how much color is shown in relation to where it came from (or where it should goes).
The only thing you need to know about any of these options is when you should choose them:
• If you are working with a number of different colors that each have their own set of properties (such as gradients along an edge), then use lightness for increasing or decreasing intensity until you reach a desired value
• If most or all of your colors have similar properties (think gradients along an edge), then use saturation for increasing or decreasing intensity until you reach a desired value
• If most or all of your colors have different properties (think grayscale/black & white), then use hue as well as saturation so that there are more shades than any single color
For example, if I added some grayscale/black & white layer effects on top my image, I would probably turn on hue because that has two significant impacts: • Gauge effect creates circular highlights around its edges
• Gradient effect creates circular highlights around its edges
You can see this in action by opening up my project folder called “layers” under my desktop screen shot below. You can see three layers whose names correspond with corresponding objects in Photoshop. The first layer has been named “Gradients” – this means it is a gradient layer – and has three circles at varying intensities representing different hues. The second layer has been named “Saturation” – this means it has an RGB